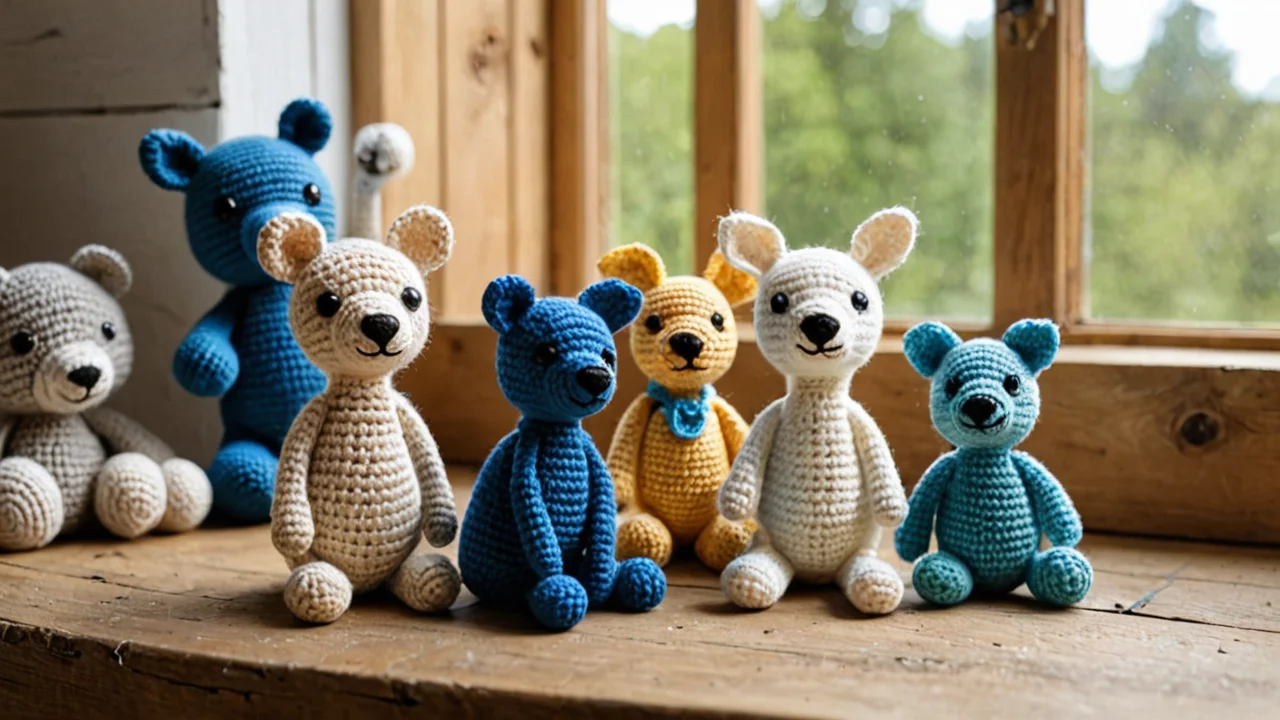
Amigurumi is crochet worked in continuous spiral rounds at a deliberately tight gauge, using a hook one or two sizes smaller than the yarn label recommends, then stuffed and shaped with increases and decreases. Almost everything that goes wrong in it — visible holes, lumpy stuffing, limbs that point the wrong way, a head that won't stay up — traces back to gauge, hook choice, or the order in which you assemble the pieces, not to the pattern. The craft is forgiving of color choices and unforgiving of loose fabric.
Gauge and hook size decide everything downstream
A tight, dense fabric is the entire structural premise of amigurumi. When you crochet a single crochet spiral at a loose gauge, the fabric has visible gaps between stitches; when you stuff it, the fiberfill shows through and the piece reads as a mesh bag with a face. Working at a tight gauge closes those gaps so the surface stays solid and the stuffing stays inside. That is why amigurumi patterns almost universally call for a hook smaller than the yarn manufacturer's suggested size, and why the same pattern in two hands can produce a firm toy and a floppy one.
Hook sizing is where a lot of confusion enters. In the Craft Yarn Council standard system, a G-6 hook is 4.00 mm, an H-8 is 5.00 mm, and an I-9 is 5.50 mm. Those are medium hooks, typically paired with worsted-weight yarn for blankets and hats — the kind of loose, drapey fabric those projects want. Amigurumi wants the opposite of drape. If your pattern calls for worsted-weight yarn and a G-6, the 4.00 mm hook is doing the structural work: it pulls the fabric in tighter than the yarn's labeled gauge would, and that is the point. If you substitute an H-8 at 5.00 mm because it feels more comfortable in your hand, you will get a noticeably looser fabric and a larger finished piece from the same stitch count. Neither is wrong, but they are not interchangeable, and the stuffing will find the difference.
Thread-weight amigurumi exists too, in the miniature-keychain end of the craft, and it uses a different hook family entirely. A steel hook size 1 is 2.75 mm in the Craft Yarn Council steel hook standards — a fine steel hook meant for crochet thread. Do not confuse a steel hook with the same-numbered aluminum hooks; the numbering systems are separate, and a steel size 1 is not a US size 1. The steel hook is a different tool for a different scale of work.
The trade-off of tight gauge is hand fatigue. Working single crochet at a gauge tighter than the yarn wants means gripping harder and pushing the hook through denser loops, and a long session on a small hook will ache. The mitigation is to work in shorter stretches and to choose a hook with a comfortable handle rather than fighting through a full limb in one sitting. The cost of loosening up to relieve your hands is a toy that shows its stuffing — a bad trade.
Materials: yarn, fiberfill, and the tools that actually earn their place
Worsted-weight acrylic or cotton is the standard amigurumi yarn because it holds stitch definition and doesn't fuzz into an indistinct blob the way a haloed mohair would. Cotton gives a crisper, more defined surface and doesn't stretch; acrylic is softer, cheaper, and more forgiving on the hands, but it pills and can lose shape over years of handling. For a toy that will be chewed, dragged, and washed, cotton's durability is often worth the extra cost. For display pieces and gifts, acrylic is perfectly serviceable.
Fiberfill is the only stuffing worth using for most amigurumi. It compresses, rebounds, and lets you control density by how much you add. The mistake almost everyone makes on their first piece is under-stuffing: a toy that feels firm and full before you close the final round will settle and soften within a day as the fill shifts. Stuff firmly enough that the piece holds its shape when you squeeze it, and add fiberfill in small pinches rather than one large clump so it distributes evenly and doesn't create lumps. Cotton batting and foam beads exist, but they behave differently and are not substitutes.
The other tool that matters is a tapestry needle — a blunt-tipped needle with an eye large enough for yarn, used for seaming, closing, and weaving in ends. The Schmetz Needle ABC guide gives machine needle sizes across the range NM 60 to NM 130, but those are for sewing machines and are irrelevant to hand-sewn amigurumi assembly. What you need is a hand tapestry needle sized to your yarn, and a pair of sharp scissors small enough to trim close without nicking the work. Stitch markers, which in amigurumi are usually just a scrap of contrasting yarn or a plastic clip, are non-negotiable: spirals have no seam to orient you, and losing your place mid-round produces an invisible error that only shows up as a lopsided shape several rounds later.
The spiral round and why amigurumi has no seam
Amigurumi is worked in continuous rounds — you do not join at the end of each round and you do not chain up. You place a marker at the first stitch of the round, work single crochet around, and when you reach the marker you move it up and keep going. This produces a smooth, seamless spiral with no visible join line, which is exactly what you want on a face or a rounded body.
The price of the spiral is that you must track your round count yourself. A joined-round pattern tells you where each round ends; a spiral doesn't, and if you lose count during a shaping section you can end up with an extra increase that throws the whole silhouette off. Mark the start of every round, and if a pattern has a long stretch of plain rounds, mark every tenth round as well. Count your stitches at the end of each increase or decrease round against the pattern's stated number; a single miscount compounds invisibly for several rounds before the shape goes visibly wrong.
The other spiral-specific skill is the invisible decrease. A standard single-crochet decrease worked through both loops leaves a small bump and a gap; the invisible decrease works through the front loops only, which pulls the fabric closed and leaves a much cleaner surface. On a shape where decreases cluster — the top of a head, the tip of a limb — the difference between the two is the difference between a smooth dome and a dimpled one. Learn the invisible decrease before you make anything you care about, and use it wherever a pattern calls for decreases in the round.
Shaping: increases, decreases, and reading a pattern's anatomy
Amigurumi shapes are built from two operations. An increase puts two single crochet stitches into one stitch, adding one to the round; a decrease works two stitches together, removing one. A sphere starts with a magic ring of a few stitches, increases evenly for several rounds until it reaches its widest point, works plain rounds through the middle, then decreases back down. A cylinder skips the decrease phase entirely and just works plain rounds. A cone increases for a while, then works plain. Once you can read a round's stitch count and recognize that rhythm, most amigurumi patterns stop looking like code and start looking like a description of a solid.
The magic ring — a loop of yarn you work the first round into, then pull closed — is the standard start because it leaves no hole at the top of the head or the tip of a limb. The alternative, chaining a few stitches and joining into a ring, leaves a small gap that stuffing can escape through and that shows on a finished piece. The magic ring takes a few tries to learn and then becomes automatic. Pull it tight before you work the second round, and weave the tail in firmly; a loose magic ring is a hole waiting to open.
Pattern-reading is where beginners lose the most time. Amigurumi patterns are usually written round by round with a stitch count in brackets at the end of each round, and the count is your check, not decoration. A round that says to work a sequence of increases and ends with a stated total is telling you the number you should have when you finish. If you don't, rip back to the start of the round rather than pressing on. The cost of ripping back is a few minutes; the cost of a miscounted round is a piece that is subtly wrong in a way you can't fix without undoing the whole section.
Assembly is half the craft and most of the visible quality
Most amigurumi is made as separate pieces — body, head, limbs, ears, snout — and joined at the end. The quality of that join determines whether the finished toy looks handmade in the good sense or the other one. Two things matter: pinning before sewing, and sewing with the same yarn as the piece rather than thread.
Pin each piece in place with the piece stuffed and the body stuffed, and look at it from several angles before you commit a single stitch. Limb placement is the most common regret: arms set too high make a figure look startled, legs set too close make it look unstable. Pinning lets you move things without consequence. Once you sew, you are committed, and unpicking a sewn limb leaves holes in the body.
Use a tapestry needle and a length of the same yarn, and sew through the body and the limb with small, firm stitches around the full circumference of the join. A limb attached with a few stitches at the top will flop and eventually pull loose; one sewn all the way around will hold through handling and washing. Thread is too weak and too thin for this — it cuts into the yarn and breaks under the stress of a child dragging the toy by one arm. The same yarn, firmly sewn, is the durable choice.
Facial features are the last step and the one that decides the piece's character. Safety eyes, which are plastic domes with a locking washer, are the standard for toys given to children, because they cannot be pulled off the way sewn features can. They must be inserted before the head is closed and stuffed — you push the post through the fabric, seat the washer on the inside, and the lock is permanent. Position them by eye, check the expression, and adjust before locking, because once the washer is on, it does not come off without destroying the fabric around it. Embroidered features are the alternative for very young children or for a softer look, worked with yarn or embroidery floss before or after closing depending on the pattern. The trade-off is durability: embroidery is softer and safer but wears faster than a locked safety eye.
Where amigurumi goes wrong, and how to choose your first projects
The three failures that account for most disappointing amigurumi are loose gauge, under-stuffing, and rushed assembly. Loose gauge shows as visible holes and a shape that sags; the fix is a smaller hook, which is why the pattern's hook recommendation is a floor, not a suggestion. Under-stuffing shows as a soft, deflated piece within a day or two of finishing; the fix is more fiberfill, added in small pieces, packed firmly enough that the shape resists a squeeze. Rushed assembly shows as limbs at odd angles and features that don't line up; the fix is pinning and looking before sewing. All three are cheap to avoid and expensive to fix after the fact.
A fourth failure is less discussed: choosing a first project that hides its own mistakes. A small, simple sphere — a single-color ball with a face — teaches the magic ring, the increase and decrease rhythm, stuffing, and closing, and it is small enough to finish in an evening. A multi-piece figure with color changes, small limbs, and detailed features teaches all of that plus assembly, and it is a much longer commitment before you see whether your gauge was right. The order that works is: one small round shape, then a simple cylinder, then a two-piece figure with limbs, then something with color changes. Each step adds one new skill rather than several at once, and each finished piece tells you whether the previous step's technique actually held.
The honest trade-off of amigurumi as a craft is time-to-satisfaction. A single small piece might take an evening; a detailed figure can take many sessions, and the assembly phase at the end is unglamorous work that determines the result. That is the cost. What you get in return is a craft where the technique is learnable in a few sessions and the ceiling is high — the same basic operations produce a simple ball and an elaborate character, and the difference is patience and practice rather than a new skill set. Start with a hook smaller than feels natural, mark your rounds, stuff firmly, pin before you sew, and the first piece will already look like what you intended.